Long gone are the days of plain paper wallpaper. Interlining and vinyl are the top sellers today. MirSovetov tells about the advantages of these wallpapers and how they need to be properly glued.
Pros and cons
Non-woven wallpaper- A great option for gluing in residential areas. They are durable due to their base, do not tear, do not fade. They are easy to care for - you can vacuum or wipe with a damp cloth! They can be glued even in the nursery - these wallpapers are breathable, non-toxic. Even in new buildings, they simply have no competitors - non-woven wallpaper "stretches" perfectly and covers small cracks that form when houses shrink. It is difficult to damage this wallpaper, but it is possible - your cat will succeed. Non-woven wallpaper is not cheap, but it's worth it. Beautiful appearance, practicality and environmental friendliness - it's worth overpaying for it.Modern vinyl wallpapers- favorites of designers. With their help, you can perfectly imitate a stone surface, decorative plaster, a cut of wood and even ceramic tiles. Vinyl wallpaper - two-layer. The bottom layer is fabric or paper, the top is finely porous PVC. Thanks to the latter, these wallpapers are perfectly washable and even breathable. They will last a long time in the bathroom, hallway or kitchen, to say nothing of ordinary living rooms. The only thing that vinyl does not like is sudden changes in temperature and humidity, so you should not glue them in an unheated dacha. The price is more than affordable. The price range is very wide - from ordinary wallpaper to elite textural.
How to glue non-woven wallpaper
We already have a prepared wall and a roll of non-woven wallpaper. We will show the gluing process on the example of a panel. In a certain place in the room, you need to glue two strips of wallpaper - the so-called panel. We measure the wall - 2 meters 50 cm. We measure the strip 10 cm longer, mark the cut and cut it. Then we smear with special glue for non-woven wallpaper.An excellent, well-proven glue is Quelyd. Dilute it in advance with warm water, adhering to the proportions indicated in the instructions.
 In principle, when pasting walls with non-woven wallpaper, you need to smear only the wall with glue. The manufacturer processes the back side of the wallpaper with special glue, but its shelf life is limited, and no one will give you a guarantee that it has not expired while the roll has “traveled” through warehouses and stores. Therefore, we play it safe and coat the strip well with glue. It is most convenient to apply glue on a table, the surface of which must be covered with a cloth - for example, an old sheet. Lubricate small sections of a sheet of wallpaper, gradually folding it. You can let the strip soak for a few minutes in a folded state.
  Of course, for gluing you will need an assistant - a person who will align the strip along a previously strictly drawn vertical. We apply and align the wallpaper in two planes.
 We pass through them with a dry roller (we expel air, glue residue, press the wallpaper against the wall).

 Movements should be only vertical, do not try to stretch the strip to the sides. As you can see, extra pieces may remain at the top and bottom. They should be carefully cut with a knife, using an even thin ruler or “corner” as in the photo.

The next strip is glued in the same way, end-to-end (no overlap).

I do not recommend MirSovetov readers to use the so-called docking tapes at the junction of the strips. They are very fond of being offered by wallpaper sellers, but there is simply no point in using them. When drying under non-woven (as well as under other) wallpapers, any unevenness is visible, so why “put” also a strip of docking paper. With proper pasting of wallpaper and the use of high-quality glue, the joints of the strips will not be visible and will not “disperse”. Don't worry!
Sticking vinyl wallpaper
Vinyl wallpapers also require a perfectly smooth wall. So you can’t avoid preparation with the help of starting and finishing putty. We glue the wallpaper in the same way - we measure and cut strips along the height of the room plus five centimeters of allowance.You need to select a pattern on all wallpapers at once. It is more convenient to do this on the floor, and not on the wall. If your wallpaper has a pattern, before cutting the stripes, select a pattern. Why do you need to cut the strips right away? There are cases when there are tears, spots, stripes of marriage in the roll. And so you will immediately know if there is enough wallpaper for the room or you will have to buy more.
 And immediately try to mark the top of each strip with a pencil so as not to get confused.
  Then we spread two or three strips with glue for vinyl wallpaper, fold them, let them soak for 5-7 minutes.
  At this time, apply glue to the wall. We apply a strip, level it with a special roller. Then, at the junction, remove the glue with a clean, dry cloth. And so we glue each strip. Please note that special attention should be paid to the joints - carefully roll them with a roller so that the wallpaper fits snugly against the wall. Do not stretch the vinyl wallpaper in width, after drying they will shrink in width and expose the wall in the area of \u200b\u200bthe joints.
Be afraid of drafts! In the room where the wallpaper is cursed, they should not be, otherwise you risk that the stripes will simply “lie down” on the floor by morning. And do not buy vinyl wallpaper 70 centimeters wide. As practice shows, when gluing almost all such wallpapers, the joints of the strips are very noticeable. Moreover, they are visible from one angle, but not from another.
Not everyone knows how easy it is to glue non-woven vinyl wallpaper. What is the correct gluing of vinyl wallpaper and the most important secrets of this construction and repair process will tell this article.
Today, many people are trying to learn how to properly glue non-woven vinyl wallpaper in order to avoid major mistakes. After all, there are many who want to create an exceptional home interior with the help of this building material, especially since the magnificent palette of colors and high practical characteristics of this wallpaper will satisfy any taste.
Vinyl wallpaper manufacturers guarantee the undeniable advantages of vinyl wallpaper over other wall design products. First of all, they note durability, wear resistance, excellent ability of vinyl to resist moisture, temperature changes, drafts. Attracts the external presentability of the repair, as well as the cost (vinyl wallpaper will cost less than tiles, PVC panels, plastic and other building materials).
Necessary construction and installation tools
To qualitatively glue vinyl wallpaper on a non-woven base, you should use a special working tool.
Required tools:

- Brush for applying glue and roller for smoothing seams. The strength of the wallpaper material attached to the wall directly depends on the quality and quantity of the applied vinyl adhesive. It is possible to economically treat the wallpaper surface with vinyl glue only with a convenient brush. Narrow or wide vinyl wallpapers are glued butt-to-butt, which means that the contact points of the wallpaper strips should be as invisible as possible. A special roller is needed to smooth the seams.
- A well-absorbing sponge and a clean rag will be useful for removing glue from the seams and smoothing the surface of the glued sheet (removing air bubbles, evenly distributing the glue).
- Tape measure, ruler and sharp scissors, a special ruler for trimming the ends after gluing and a knife for trimming the excess.
- A plastic or enamel bucket for diluting the glue (not metal, so that an oxidation reaction does not occur!).
- Spatula for removing whitewash and remnants of old wallpaper, sanding irregularities from the wall.
- Stepladder and plumb bob.
This is the main tool for the job to securely fix the vinyl wallpaper in the interior.
Advantages and disadvantages of vinyl wallpaper

Among the wide range of materials for wall decoration, non-woven wallpaper has significant differences. How do vinyl wallpapers differ from other repair analogs, according to experts?
- German vinyl wallpapers have a service life of more than 15 years, according to experts. And this is without losing their physical properties (strength, density) and visual characteristics (color content, brightness, brilliance). Modern production technologies offer the buyer foamed vinyl wallpaper, hot stamping wallpaper on paper or non-woven base and other types. Each type has an article, i.e. alphanumeric designation that will provide the buyer with information about the material of manufacture of this type, manufacturer, model and palette of colors, roll width (meter or half meter), etc. The article and a sticker with the label of the manufacturer are on each roll.
- Is it possible to glue non-woven wallpaper on the wall completely dry? Yes, it is enough to smear only the wall with glue. Such one-sided processing does not cause soaking of the wallpaper fabric, simplifies the technology of fixing the joints, and also does not tighten the sheets when dried.
- The non-woven surface does not delamination over the years, which allows you to remove the worn wallpaper from the walls without difficulty.
- If you choose vinyl wallpaper for the kitchen with non-woven pores, then no condensation or mold will ever appear on the wall.
- A collection of vinyl wallpapers with a chic palette of floral coloring will satisfy the wishes of the most capricious buyer!
This is not a complete list of the benefits of a non-woven vinyl product. A logical question: can vinyl wallpaper for renovation be considered the standard of quality? Perhaps yes! This option to create comfort in the house is worthy of attention!
Stages of gluing vinyl wallpaper products
The task of how to glue vinyl wallpaper for the kitchen or any other room will be easy for everyone. The technology is simple and clear! And the process itself will not cause difficulties.

- We prepared the necessary tools, bought multi-colored or white non-woven vinyl wallpapers, cleaned and primed the uneven surfaces of the walls.

- If the wallpaper sheets are glued to the ceiling, then you can measure the length of the wall and start cutting strips of the same size from the roll. But, if the level of gluing deviates from the height of the ceiling by a certain distance, then with the help of a tape measure, a ruler and a marker, you need to draw the boundaries of the upper level. Take measurements from the floor. Connect the top marks with a marker into a continuous line around the perimeter of the room. This is a kind of check-hint for the master in the process of gluing.

- It is necessary to cut vinyl washable or other types of wallpaper into strips of a certain length with an increase of 5-7 cm. This is for safety net, and at the end of the work these excesses are removed.

- When the strips of the desired length are cut off, and the wall for the first wallpaper strip is prepared (i.e., primed with glue), you can begin to glue the strips onto the wall. We start from the corner closest to the window. Using a plumb line, draw a vertical line - this is the so-called lighthouse. We apply the sheet from top to bottom, and try to connect the edge as accurately as possible with the lighthouse. It is necessary to smooth the canvas carefully from the middle of the strip to the edges, also from top to bottom.

- We glue all the following strips in the same way. The beacon will be the edge of the previous wallpaper strip. That's how easy it is to glue the joints. It is necessary to prime part of the wall with glue immediately before gluing the wallpaper. Strengthen the joints with a roller to smooth the seams.
ADVICE: Do not allow even the slightest drafts or temperature fluctuations in the room until the wallpaper in the corners is completely dry!
Vinyl wallpaper: choice, sticking and tips
Do-it-yourself pasting technology

With a guarantee of quality, repairmen will be able to quickly and accurately glue colored or plain vinyl wallpaper on non-woven base. Is it possible to do this repair yourself? Yes, you can glue! All work with success will be done by an ordinary person easily.
To quickly complete the repair, you need to try to follow these tips:
- Participation in the repair of at least 2 people will facilitate and speed up the process.
- Do not save on the purchase of building materials and tools.
- Adhere exactly to the indicated stages of work, even if any of them seems insignificant to you.
- It is forbidden to fuss and rush in repair matters!
The question often arises: at what temperature is it better to glue the material on non-woven fabric? The answer is simple: at a normal room temperature.
How to glue different types of vinyl wallpaper in the corners

Gluing wallpaper in the corners of the room is perhaps the most difficult moment of the entire repair. Specialists have developed and tested in practice a number of rules, thanks to which all difficulties can be easily neutralized.
There are two solutions:
- In order to glue erismann vinyl wallpapers with a pattern in the corners in a high-quality and beautiful way, you should lead one canvas from 1 to 5 cm around the corner, and glue the second overlap exactly in the corner.
- In order to beautifully decorate the vinyl wallpaper flowers in the interior of the Erismann company (article 5652) in the corners of the room, both the first and second halves of the wallpaper are glued with an indent of 5 cm from the corner overlapping each other. Then, a cut is made neatly strictly along the corner and the five-centimeter parts are removed. Deciding how to glue the joints of these strips is quite simple. It is necessary to coat the corners with a new layer of glue and carefully smooth it with a dry, clean cloth.
Any of these methods will allow you to easily and quickly, and most importantly, decorate the walls beautifully and create coziness in the room.
ADVICE: If, according to the design idea, painting of vinyl wallpaper is necessary, then it will completely hide even hints of wallpaper joints in the corners.
How long does wallpaper dry

Hot embossed vinyl wallpaper (article starts at 40) or foamed vinyl (article starts at 28) on a non-woven base is a fairly dense material. Even if you smear wallpaper paste only on the surface of the wall, it will take much more time to polymerize the adhesive than to dry the paper base. Practitioners call the period up to 48 hours. During this time, it is not advisable to paint the floor here, paint vinyl wallpaper, or perform other work.
ADVICE: For high-quality drying of wallpaper sheets, close the door and windows to the room where the renovation is taking place, and do not enter it for 2 days.

Is it necessary to visually “hide” the unevenness on the wall in the room? You will definitely not find a more profitable and simple solution than light vinyl wallpaper! For example, beige will help to qualitatively hide damage on the wall, as well as visually expand the room and make the atmosphere in it “warmer”.
Vinyl sheets are ideal for the kitchen or other rooms. It is especially convenient to glue meter-long canvases on the walls. It is easy to wash vinyl wallpapers that are washable from grease and dust: a regular soap solution will do it quickly.
It is effective to use vinyl material for painting, because. the charisma of the interior will only benefit from this. In addition, painting vinyl wallpaper greatly increases their already exemplary operational durability and endurance. Builders have no special rules on how to paint vinyl. If you choose vinyl wallpaper for painting, then the boundaries for your own creativity disappear completely!
Often master amateurs ask: is it possible to glue non-woven fabrics on a painted wall? Or is it necessary to remove a layer of paint before a layer of plaster?
ADVICE: water-based or paint coating on the wall causes further peeling, swelling or deformation of the glued strips!
Modern manufacturers produce wallpaper products in rolls with a meter width. Such fairly wide bands make the repair process a pleasure. Due to fewer joints, the surface is smooth and neat.

When choosing a type of vinyl canvas, I would like to pay special attention to the meter-long silkscreen wallpaper. Silk-screen printing is a material where a bright palette of colors is complemented by an exquisite gloss. With their help, the interior of any room becomes an ultra-realistic design of the 21st century. A chic palette of color assortment, silk-screen printing is presented to customers by Erismann and other manufacturers of wallpaper products. In company stores, such products can be bought inexpensively.
Erismann meter-long silk-screened wallpapers belong to the category of lightweight vinyl. Information about all varieties will be prompted by markings or other designations on rolls.
It is believed that vinyl wallpaper is harmful to human health. There is no scientific evidence for such a hypothesis yet.
Having chosen just such a good material for finishing the walls in the room, you can safely expect that the need for subsequent repairs will not arise soon. Beauty, comfort and pride in your construction and repair feat (if you glued vinyl wallpaper on your own) will please the owner for a long time.
How to glue vinyl wallpaper - sticking vinyl wallpaper with your own hands
By purchasing wallpaper, you are already planning to stick them on a subconscious level. You select the necessary tool in your mind, think over the processes of pasting the walls and present the final result. We would like to tell you more about some of the tools that you may find useful in your work.
Wallpaper toolKnife and scissors
We will not dwell on the choice of wallpaper and glue, this is a long and painful process that everyone who wants to make repairs at home has to go through. It is only worth noting that the glue must be chosen under the type of wallpaper.
For example, if you settled on wallpaper with a non-woven backing, then the glue must be appropriate. If you have paper wallpaper, then glue is recommended for paper wallpaper.
Wallpaper and glue are ready to go, print the rolls and cut the wallpaper into pieces of a certain length. To do this, we need a knife or scissors. Later, you will have to cut the wallpaper on the wall, so it is better to choose a simple construction knife with replaceable break-off blades. It is sharp enough to cut wallpaper, but once dull, the blade can be easily changed or broken off.
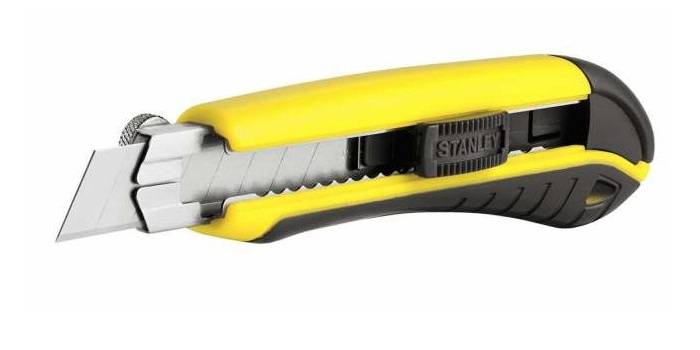 Modern knife with breakable blades
 There are special wallpaper knives with a long, wide and blunt blade, but they are very impractical and can only be used correctly by professional craftsmen, if we glue the wallpaper with our own hands, we do not need them.
Scissors will be required for accurate cutting of wallpaper in difficult places, the area of \u200b\u200bswitches, sockets. Scissors will fit the simplest.
Roller and brush
The wallpaper is cut into pieces of a certain length and ready to be glued. Now we will apply wallpaper glue to the canvas, this will require a roller or brush.
If you want to use a roller, choose the foam option as it is very easy to apply adhesive to a flat surface. If this is not the case, others will do: artificial or natural fur, velor, artificial wool. The roller can be purchased at any hardware store, this is not a scarce product. The cost of different manufacturers is not much different, and the quality too.
 Roller with velor coat
 However, recently all stores sell it already assembled, although from the point of view of practicality it is better to buy in parts: a handle (byugel) and a fur coat. Subsequently, spare parts are changed if necessary.
When using a roller to apply glue to the wallpaper, it will be convenient to pre-roll it in a special tray, since it will not fit into every bucket. Such a bath is available in most stores, it has a special compartment where you can roll the roller, saturate it with glue. Even ready-made sets are sold, consisting of a bath and a roller.
 Set: bath and foam roller
 It is also convenient to apply glue to the wallpaper with a brush. To do this, it is recommended to choose any brush, the pile of which does not climb. Whether the brush has natural bristles or not, it doesn't matter to us.
Brushes with a lot of bristles show themselves well, they are called maklovits. Unlike flute - narrow, they have 8-10 rows of pile. Choose a wider flat brush, preferably 75-100mm.
You may need a narrow brush to coat the wallpaper in hard-to-reach places where the roller does not fit in any way, this moment must also be foreseen.
Spatulas
 The simplest but most convenient wallpaper spatula
 If you are used to smoothing the wallpaper with a regular rag or brush, then this is also the right approach. We need dry rags to wipe the wallpaper and remove glue residue.
Some masters use a rubber roller to smooth the wallpaper, its fur coat is soft, made of rubber. However, a certain amount of experience in construction work is required to use this tool.
To work with wallpaper joints, there is a special small roller that allows you to roll the joint seam, thereby getting rid of excess glue.
 Roller for rolling wallpaper joints
 For cutting in hard-to-reach places, an ordinary metal spatula is useful, which is very convenient to fence off an unnecessary edge. After you have separated the unnecessary part of the wallpaper, we cut it off easily and evenly with a knife.
Use the spatula very carefully so as not to damage the decorative part of the wallpaper.
Ladder
If you have high ceilings, then you should take care of the normal comfortable means for working at height. from a stool or chair carries with it many difficulties and can be dangerous. While a normal stepladder will greatly facilitate your entire workflow.
Choose aluminum ladders, iron ones are hard to move, dragging it back and forth throughout the wallpapering, you will definitely get very tired.
 A low stepladder that is easy to use at home
 For successful wallpapering, you will additionally need:
- a plumb line or level to evenly beat off the vertical line, relative to which gluing will be performed;
- pencil or marker to make marks on the walls;
- tape measure, for a clear marking of pieces of wallpaper and walls;
- a container for mixing glue, preferably with a lid, in case you have to leave the glue ready;
- a stick for mixing glue, or a special mixer worn on a drill;
- duct tape and a screwdriver to ensure safety in places where sockets and switches are present, especially if you are not going to completely de-energize the room.
If you have all the listed tools available, then with a high degree of probability wallpapering will be successful. Perhaps we are unnecessarily focusing on simple and understandable things, but you can simply forget about them. If something from our list is not there, then try to find it so as not to complicate your work.
Modern washable wallpaper is a universal wall covering for the kitchen, hallway and bathroom. They have increased strength, good wear resistance and a wide range of colors. How to choose the appropriate type of washable wallpaper and paste them correctly, we will tell in our article.
Moisture-resistant wallpaper for walls is an excellent option for decorating the interior of the kitchen, hallway and even the bathroom. This finishing method often serves as an alternative to tile, since the cost of rolled material is much lower, and it is much easier to work with it.
Features of washable wallpaper
Washable wallpapers are designed for use in rooms with a high level of humidity, which places special demands on their composition. High wear resistance has a downside - a special coating does not allow the walls to "breathe". So if you decide to glue wallpaper of this kind, you need to take care of good ventilation.
The material is almost universal:
- Suitable for gluing any surfaces (concrete, plaster, drywall, etc.).
- Does not require special care (just a brush and a damp cloth).
- It has a long service life (10-15 years).
- Quickly glued and just as quickly removed from the walls (if necessary).
In order to simplify the choice, manufacturers use a single international labeling system. The label depicts one or more wavy lines and a brush.
What does the marking on washable wallpaper rolls mean?
- One line. Moisture resistant wallpaper, not intended for washing. When sticking, you can remove excess glue from their surface with a damp sponge.
- Two lines. A washable option that tolerates wet cleaning using non-aggressive compounds.
- Three lines. Super washable wallpaper. Not afraid of saturated soap solutions and washing with a sponge.
- Line plus brush. Wallpaper can be washed with a soapy brush.
- Three lines plus a brush. Particularly durable material, resistant to abrasion.

Additional letter marking indicates the material from which the wallpaper is made:
- RV - embossed vinyl.
- BB - foamed vinyl.
- PV - flat vinyl.
- STL - fiberglass wallpaper.
- STR - structural wallpaper for painting.
For the hallway, you can choose wallpaper with increased water resistance, for the bathroom and kitchen, washable and super-washable options are suitable. Try to assess the degree of possible contamination in advance: if the coating will have to be washed frequently, it is better to give preference to models with an unexpressed texture. Embossed and embossed wallpapers in such conditions will quickly lose their aesthetic appearance.
Types of washable wallpaper
Washable wallpapers differ in the material from which they are made and the method of processing the front side. Each type has its own performance characteristics that must be considered when choosing.
| Name | Compound | Subspecies | Life time | Peculiarities |
| Acrylic wallpaper | Foamed acrylic on a paper backing | foam wallpaper | 5-6 years | Acrylic is applied pointwise, which allows the material to "breathe". Wallpaper cannot be brushed. |
| Vinyl wallpapers | Base - paper or fabric, top layer - PVC | Foamed Vinyl, Flat Vinyl, Embossed Vinyl | Up to 20 years old | Resistant to fading and fungus. Suitable for painting (up to 15 times) and frequent washing. Suitable for kitchens and bathrooms. |
| Glass fiber | Fiberglass (quartz sand, lime, dolomite, soda) | Single-layer and double-layer (on a paper basis) | Over 20 years | Environmental friendliness, high wear resistance, the possibility of repeated repainting, resistance to aggressive environments. |
| Metallic wallpaper | Multi-layer option: porous paper, aluminum foil, current ink, decorative coating | hand painted | Over 20 years | High cost, vapor permeability of the material. Wallpaper scratches easily. When sticking, you need to turn off the electricity. Wiring lines must not pass through the wallpaper. |
| Cork with wax coating | Cork oak bark, waxed | Various decor options | Up to 20 years old | They require a perfectly flat surface. Antistatic, eco-friendly. Can be vacuum cleaned. |
We do not give the approximate cost of the listed types of wallpaper, since the price categories of different manufacturers are very different. If we are not talking about elite options, then in almost every form you can find wallpapers that are affordable for your budget.

Washable wallpaper also includes various rolled synthetic materials (for example, self-adhesive films on a paper or fabric basis). The films can be stylized under the skin (devinon), imitate a relief pattern (isoprene, foam) or be covered with a thin layer of plastic (intended for further coloring).
How to glue washable wallpaper
As a rule, washable wallpapers are heavier than "land" options. That is why it is worth paying special attention to the selection of glue:
- For vinyl wallpaper, you need a special glue (for example, "Super Vinyl"). It glides well, which makes it easy to fit joints.
- Acrylic and glass wall papers require the use of an acrylic adhesive (eg VGT). It is applied only to the wall, the canvas itself does not need to be smeared.
- Metallized wallpaper is glued with a dispersion adhesive with a fungicide. They conduct current well, so safety precautions must be observed.

Important! The most common misconception buyers: the denser the wallpaper, the better they hide the unevenness of the wall. This is not entirely true. The relief and "ductility" of the canvas are responsible for masking defects. The cork will show even the smallest differences in the plaster - the seams simply will not converge on the wallpaper. Vinyl and acrylic are more effective in this regard, especially if you choose wallpaper with a suitable pattern.

Before sticking wallpaper, you need to carefully study the instructions on the label (different manufacturers may have their own recommendations). You need to start gluing from the window. Masters advise to apply preliminary markup. The main condition is to ensure that the seams do not overlap each other. Due to the considerable thickness, such an overlap will be conspicuous.
Washable floor care
At the beginning of the article, we mentioned the labeling applied by the manufacturer. It is useful to keep the label in order to properly care for the wallpaper.
Despite the prefix "washable", washing the wallpaper is better not to abuse it. Sometimes dry cleaning with a vacuum cleaner or brush is enough.

It is better to wipe the coating with a carefully wrung out cloth. Excess moisture can cause the canvas to peel off the wall. In addition, uneven drying will provoke the appearance of ugly stripes and streaks.
The washable coating is an excellent combination of practicality and original appearance. Among the variety of types of wallpaper, you can always choose the right pattern and texture, and following simple care rules will help to preserve the appearance of your walls for a long time.
Non-woven wallpaper is considered to be a universal coating, both externally and qualitatively, they will appeal to the average buyer. True, he may immediately have questions, but will it not be difficult to stick non-woven wallpaper, can you do it yourself, is it easier to glue meter or standard wallpapers? And how to prepare the surface of the walls for gluing?
A big plus is that the interlining for the walls does not need special care. If it is for painting, then dispersion and acrylic dyes will look great on it. Most of these wallpapers are not afraid of moisture, so you can wash with soapy water.
As for the preparation of the walls before work, it is very important that the entire surface is of uniform color and, if possible, that its color does not contrast with the color of the wallpaper.

Some important points in gluing non-woven wallpaper:
- Good non-woven wallpaper has a high-quality edge, which allows you to glue these wallpapers end-to-end. And the neighboring canvases will look like a continuous coating, and the seam, one might say, will not be visible.
- Wallpaper is prepared only after checking them for marriage. Follow this rule at all times: first inspect the entire unfolded roll, and only then cut.
After that, prepare the tools for gluing.
Non-woven wallpaper: how to choose (video)
Tools for sticking non-woven wallpaper
Everyone who glues wallpaper himself, with his own hands, has his own list of necessary tools. But if you are doing this for the first time, or are unhappy with past experience, you can use the following universal list.
Sticking tools:
- Building level (if there is a laser - ideal);
- Roller with long pile;
- Roulette in 5 m;
- Plastic spatula for rolling wallpaper;
- Sharp knife for cutting wallpaper
- Narrow spatula (metal);
- Pencil;
- Foam sponge;
- A bucket for glue and a bucket for water.

Perhaps some additional tools may be needed to prepare the walls. Wide wallpapers are glued using the same tools.
How to glue non-woven wallpaper
Non-woven wallpaper is remarkable in that it can be glued to virtually any surface - plaster, wood, drywall, chipboard, paper, concrete. Be sure to clean the surface of the walls from the previous coating, if the wall is painted - the paint must also be removed. If there are good reasons not to remove the paint, at least sand the painted wall so that the wallpaper adheres to the surface more easily.
Is it possible to glue non-woven wallpaper on old wallpaper
Theoretically, this is possible, but there are some nuances.
How to glue non-woven wallpaper on the past wallpaper:
- The former coating should be papery and thin;
- Old wallpaper should be firmly attached to the surface of the walls;
- Old wallpaper cannot be significantly darker than new.

It is worth warning that the risks of defects in this case are high. For example, bubbles may appear under the wallpaper, or the wallpaper may begin to delaminate. It is believed that the period of use of a new coating from such gluing is reduced.
Do I need to glue non-woven wallpaper with glue
It happens that during the repair a person is overcome by doubts, and he still smears both the strip and the wall. If, as it happens, you have already smeared the strip, then you do not need to apply glue to the wall. Just wipe it with a cloth at the joints.

But it is easier to apply on the wall, and then glue the prepared strip. Mistakenly, many smear the entire surface of the walls, but you only need the area of \u200b\u200bthe nearest work. If the wallpaper is meter long, this zone increases.
Is it possible to glue non-woven wallpaper on non-woven wallpaper

With a spiked roller, go over the surface so that as many holes as possible form on the old wallpaper, then the hitch with the new ones will be better.
Do I need to prime the walls before sticking non-woven wallpaper
Priming, of course, is always worth it, no matter what wallpaper you glue. And already non-woven wallpaper definitely needs to be glued to a primed wall.
A primer is not needed only if:
- If the repair is temporary, and the wallpaper, in principle, is not intended for a long service;
- Wallpaper is light and papery.

What is wall primer for? It's simple - it increases the adhesion (that is, adhesion) of materials, they will better stick to the base.
Is it possible to glue non-woven wallpaper on a concrete wall
Just like that, glue on concrete, of course, is not necessary. First, level the surface with your own hands, putty and primer.
How to prime a concrete wall:
- Take a liquid adhesive solution. In the first layer, apply the adhesive evenly, and in the second layer, the adhesive solution should be thicker.
- Double coating will increase adhesion, which guarantees successful wallpapering.

Without a primer, you can still relatively successfully cope with paper wallpaper, but you need to glue heavy non-woven wallpaper with a preliminary primer.
Is it possible to glue non-woven wallpaper with an overlap
If with your own hands you have not previously glued in this way, you can use the technique of the masters. They glue the non-woven wallpaper with an overlap, and then, as the glue is absorbed, they cut the line with a clerical knife along the level so that the excess tape is removed from the adjacent wallpaper.

It turns out that the joint will come out perfect, exactly in the middle of the "overlap". But, nevertheless, it’s quite difficult to glue like that, so the best way is end-to-end.
How to glue non-woven wallpaper on drywall
Somehow this sticker will not be radically different. But there are features that are worth considering.
How to glue non-woven wallpaper on a plasterboard wall:
- On one wall, draw a vertical marking, and glue from there;
- When gluing the first canvas on drywall, adjust the height;
- Turn the second side of the non-woven wallpaper at an angle;
- If the wallpaper protrudes slightly above the plasterboard wall, they can then be trimmed.

Cut off excess wallpaper with a sharp knife, and a flat spatula applied to the wall will be a guide for cutting.
The technology of pasting walls with non-woven wallpaper
After the wall is primed, the vertical markings are done, you can start gluing with your own hands.
Pasting non-woven wallpaper in steps:
- Mix the wallpaper paste and apply it with a roller to the wall section;
- Bring the cut canvas to the wall, you need to start pasting either from the window or from the corner;
- You can smooth the canvas with a plastic spatula;
- If vertical lines are drawn on the wall, the work will go faster;
- Cut off the excess at the floor with a sharp knife.

It’s good if the wallpaper goes 1 or 2 cm onto the plinth, which is first removed, and put in place after pasting.
In order for the surface of the corners to be even, even in the process of puttying, you need to decorate the corners with plastic corners. If the surface of the corners is uneven, it is there that the wallpaper will begin to flake off first.
How to glue non-woven wallpaper (video)
Features of gluing non-woven wallpaper
Even if in each instruction it is clearly written several times how to glue, with what glue, and in what sequence, people often decide to “amateur”.
However: always level and prime the wall. Always mark up and cut the canvases in advance. Always use special glue without experimenting with composing it.
Is it possible to glue paper wallpaper with non-woven glue
If there is glue left from a previous repair, or for some reason you decided to glue not non-woven, but paper wallpaper, then you can use non-woven glue.

The only thing is that paper wallpapers are thinner in structure, so the glue for them should be lighter. In this case, when mixing non-woven adhesive, more water must be poured so that it is not so heavy.
Is it possible to stick wallpaper on non-woven wallpaper
You will need to remove old non-woven wallpaper, whether it be standard or wide meter. And you can remove them if you go through the wallpaper with a spiked roller, and then moisten.

If you decide to use a steam generator, be sure to:
- Put on gloves (rubber);
- Tuck sleeves into gloves;
- Protect the floor from water.
If the old wallpaper is not removed, then fresh glue will begin to soak into the pores of the old wallpaper, softening the old layer of glue, which may cause bubbles.
Why do non-woven wallpaper peel off
There are several reasons that affect poor-quality wallpapering.
Why does non-woven wallpaper peel off:
- Poor wall preparation. Even if there are small holes in the wall, the wallpaper may peel off. All defects must be removed, the wall leveled and primed.
- Use of unsuitable materials. Wrong glue - and already all the work can stand up.
- Wrong sticker. Glue only the wall, and only that part of the wall that will have to be glued in the near future. Glue butt.

Also, do not resort to forced drying, then the wallpaper will definitely peel off. Sometimes this method is used if wide meter-long wallpapers are glued. But even such meter-long wallpapers are glued according to the same principle, and they are also afraid of forced drying.
Bubbles on non-woven wallpaper after gluing
How to glue non-woven wallpaper to prevent bubbles? They appear, as mentioned above, due to insufficient preparation of the wall.

To eliminate bubbles, you need:
- Make an incision on the bubble with a sharp clerical knife;
- After that, try to gently straighten the wallpaper, draw glue into the syringe and squeeze it through the incision into the wallpaper;
- Spread the wallpaper fragment well, and press it against the wall with a clean cloth.
Wide meter wallpapers can also be with bubbles after gluing, do not undertake to glue them alone, the risk of bubbles and peeling will be high.
How to glue non-woven wallpaper (video)
If you understand how to properly glue non-woven wallpaper, the process itself will not be difficult. After a good primer and proper marking, the strips will stick easily, and the process will not be delayed. Quality materials and good wall preparation will ensure a good result.
Happy repair!